This word has several definitions...
depending on who you talk to.
If you ask Dictionary.com, most people in the Southern part of the united states, and many housewives, they will define "buttercream" as:
"A vanilla-flavored cake frosting or filling made principally
of softened butter and powdered-sugar."
If you ask a foodie, trained pastry chef, or someone who works at a fancy schmancy cake shop, their answer will most likely describe a concoction of egg whites, sugar, butter, and some flavoring (and yes, those are the only ingredients).
When I say buttercream, I am usually referring to the latter of the two: Meringue Buttercream. Today I'm going to break down this recipe and tell you exactly why this is the type of icing that most professional bakers prefer to use on all of their cakes, and why it is so easy for you to replicate for use at home!
So, let's get started!
Basic Components of Meringue Buttercream:
1. Butter (unsalted)
2. egg whites
3. sugar
4. flavor (vanilla, coffee, chocolate, etc.)
Butter:
The largest component of buttercream is, naturally, BUTTER! The purpose of butter in Meringue Buttercream is to add body, make the icing more stable, rich, and unctuous. It also adds that delicious creamy, fatty, silky-smooth mouth feel that everyone expects from the icing on a cake!
Egg Whites & Sugar:
So here is a little math problem (and my fellow bakers, don't shout out the answer before everyone has the chance to think about it!):
Egg whites + Sugar = What???
The answer is Meringue! This combination of egg whites and sugar is what differentiates traditional powdered-sugar/shortening/butter buttercream with Meringue Buttercream.
Let me tell you, making a meringue is something that most people think is simple and easy, but it is also something that is easily misunderstood and done improperly!
Did you know that there are 3 different types of meringue? Each type depends on how you combine the egg whites and the sugar, and each type has a different strength and can be used for different things. In fact, you have probably made some of each type for different recipes and never knew that you were doing so!
Here is a little table for you to describe the different types of Meringues:
Type of Meringue | How it is Made | Common Uses | Strength |
Italian | A sugar syrup is made by cooking sugar and water to 240 F, and is slowly poured into whipping whites. | This type can be eaten as is and is egg safe, so it is good for toppings, mousses, and ready-to-eat uses. | Strongest type of meringue because of the sugar syrup. |
Swiss | Sugar and egg whites are combined and heated over a double-boiler until 140F, which makes the mixture egg safe, and then whipped to the desired peak. | Since the egg whites and sugar are heated until egg safe, this can also be eaten as-is and is good for toppings, mousses and ready-to-eat uses. | This is the second strongest meringue. |
French | Sugar is slowly added to whipping egg whites. | Since the egg whites have not been heated to ensure that the meringue is egg safe, this type of meringue should only be used in recipes that are to be cooked further, such as chiffon cakes, angel food cakes, and baked meringue cookies. | This is the weakest of the three types of meringue. |
Flavor:
When you go to flavor a meringue, it is best done after the meringue is made (unless you are making a caramel meringue, in which case you would caramelize your sugar first before proceeding). Most flavorings, such as vanilla bean or extract, chocolate, alcohol, and nut pastes like Peanut Butter or Nutella can be added soon after you make or reconstitute your buttercream.
WHY MERINGUE BUTTERCREAM??
I know most of you are sitting there thinking "NOOOO!!!! Don't take away my tooth-ache-powdered-sugar-awesome-on-cupcakes-buttercream!" Now believe me, there is a place in this world for icings like that, and in some cases, I whole-heartedly accept them (check out this amazing fudge frosting recipe on one of my favorite baking blogs- that's the way it should be done!)
The real reason why most professional bakers use Meringue Buttercream is because its extremely smooth, and is very easy to work with. Piping intricate detail from a 00 piping tip (that's the smallest tip they make) is very hard to do if you have a grainy and sugary icing made from powdered sugar and shortening. It also tends to break in the middle of piping a long strand. Meringue Buttercream is not grainy at all because the sugar has been dissolved, so piping is a breeze and doesn't take a toll on your palm from pressing to hard!
Ok, enough talk. Let's get baking!!!
Today I'm going to show you how to make a Swiss Meringue Buttercream. I've chosen Swiss because I think it is the easiest type to do at home. Plus, I figured most people, even those who have baked before, might not want to pour molten hot sugar into their mixers if they haven't been trained on how to do it!
So, here we go!
Swiss Meringue Buttercream Recipe:
1/2 c. egg whites (about 5-6 eggs)
1 c. granulated sugar
1 lb butter
1. First, before you start, make sure your egg whites are absolutely clean. Also, re-wash your mixing bowl and whip attachment to be sure that there are no traces of fat left. This is to ensure your meringue will whip up beautifully!
2. Create a double-boiler for your egg whites by filling a pot (big enough for your mixing bowl to sit on top) with water. Make sure the water does not touch the bottom of the mixing bowl- you don't want scrambled eggs! Bring your water to a boil.
3. Combine your egg whites and sugar in your mixing bowl- be sure to whisk them together as soon as you combine them, so the hygroscopic nature of the sugar will not damage the egg whites. Once the water in your pot is at a boil, turn off the stove and set the mixing bowl on top of the pot.
4. As your egg white and sugar mixture heats, be sure to stir gently but constantly with a rubber spatula, so the whites do not cook from the heat of the water. In tradition, you need to heat Swiss Meringue Buttercream to 140F to ensure that it will be egg safe. To do this, you can either use a digital thermometer, or, you can use my favorite tool, my trusty pinky!! The way that I do this is to insert my (clean) pinky into the whites and when the mixture is a little to hot to keep my pinky in there for more than five seconds or so, it is at the correct temperature. This is a method that I learned from one of my favorite chefs at the CIA, Stephane Weber. Using your God-given hands as tools is a very French technique, and the fabulous Chef Weber taught me to be more in-tuned with what I was making by sometimes relying on my hands and my intellect instead of machines! I encourage you to try whatever method you feel is comfortable for you.
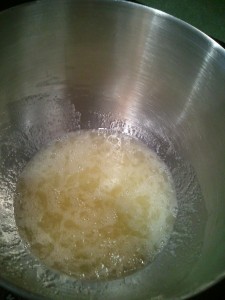
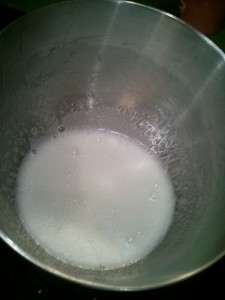
5. As you are heating your egg whites you will slowly see a change in its appearance, which will eventually result in a stronger and loftier meringue in the end.
Before Heating: After Heating:
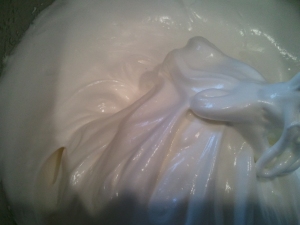
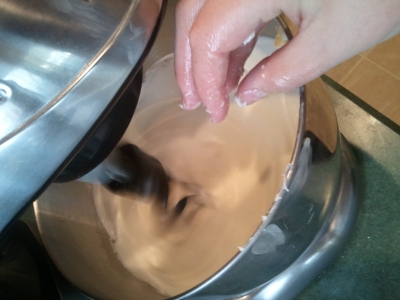
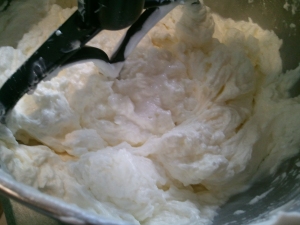
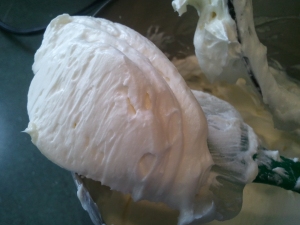
6. Once your whites and sugar are at temperature, it is time to place the bowl on the mixer with the whip attachment and make our meringue. First, start out on a medium-high speed until you see the whites start to whip up and gain some more body. This should take about 3-5 minutes or so. Once you reach this point, turn the mixer down to medium speed to stabilize the meringue and to take the meringue to medium peak (you should see the whip starting to leave a trail in the meringue in the bowl). In order to see if you are truly at medium peak, stop the mixer and remove the whip attachment. If the meringue is runny and pours right off of the whip, keep going. Remove the excess off of the tip of the whip and turn it over. It should form a nice hook, almost like the top of a Dairy Queen ice cream cone. If your meringue looks like it has cotton balls in it (you will know what I mean if this happens), you have gone too far and over-whipped your meringue! At this point, start over to ensure a good final product.

 7. Now, its time for the BUTTER! Before you add your butter, you must do two things:
1. change the whip to the paddle attachment 2. make sure your butter is extremely soft. NOT melting, but soft enough to put dents in it with your fingers! It will take longer for your buttercream to come together if your butter is cold.

8. Turn the mixer on medium speed and add the butter slowly, in small bits. As you go, the mixer will look a little strange, but do not worry!!! In the words of another chef at school, Chef Cavotti, "It always gets worse before it gets better". Honestly, if your buttercream starts to look like a chunky gross mess, that means it is coming together!
9. Like I mentioned in step eight, you want to look for a "broken" look to your buttercream to recognize that it is almost done. At this point, if you wish, you can turn your mixer up slightly to expedite the process. You will see the buttercream slowly start to smooth out, and you will know it is finished! You may use the buttercream right away, or store for about a week in refrigeration. If you are planning on using buttercream that has been in the fridge, you must reconstitute it to bring it back to its smooth consistency. To do this, take about 2 ounces of the buttercream and melt it in the microwave. Add this to the rest of the buttercream on medium speed of your mixer with the paddle attachment. It should break slightly, then come together like traditional buttercream.
The finished product!!! You are now ready to go out into the world and decorate up a storm :]
I wish you luck, and I truly hope that you will make Meringue Buttercream part of your repertoire.
It will make you a better baker, will teach you one or two things about the art of baking,
and will make decorating ten times easier!
Enjoy,
Blayre



Hey! :) So glad you commented on my blog so I could find yours! After I read your meringue buttercream post I was shocked to see it was only your second post ever! It's so informative and I love your writing style. Keep it up coz it's really great! I'm coming back for more ;)
ReplyDeleteThanks so much Robyn!!
ReplyDeleteI'm glad you are enjoying my blog. Its nice to have a place to get creative about the food I love so much. I love reading yours as well- thanks for the support :]]
Well done!!! I am proud of you! The worm lady, Mom :)
ReplyDelete